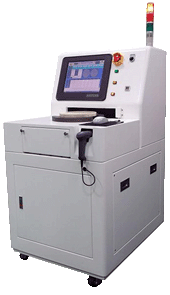
LED Wafer Process Equipment/Machine
◆Sapphire Thickness Measuring Machine
|
 |
| Devices/Units |
Specification |
| Material |
ψ355*15t (mm) or ψ485*16t ceramic plate |
| Wafersize |
2"~ 6" Sapphire Wafer |
| Ceramic plate Load/Unload |
Manual load/unload |
| Testing head |
None-touched laser detector, Z axis auto adjust the distence of laser detector |
| Thickness measurement |
1.The gap of each wafer stick on plate must > 5mm,Wafer, flat side need to face middle or round side of plate, wax residue around wafer is not allowed. |
| 2.Measurement for 4 process (Wax, Grinding, 1st step polishing, 2nd step polishing). |
| 3.Measure points : 5 pts. (1st round 1pts, 2nd round 3pts, 3rd round 1 pts); 9 pts (3 pts 3 rounds); 23 pts(1st 3 pts, 2nd 5pts, 3rd 7 pts, 4th 5 pts, 5th 3 pts). PC will calculate average, Max. & Min. for each wafer; average count of whale plate and the flatness of each wafer. |
| 4.PC may link with CIM and up-load the measuring data to particular file folder in WEB harddisk. |
| 5.Allow to proceed offline measurement. |
| 6.Average 20 sec per round (Including data transport). |
| Control |
PC BASE |
| Operation |
Screen + Keyboard + Mouse |
| Data collection |
Filing lot NO. Plate NO. and measuring data. |
| Facility reauired |
Power: 1P2W 220V, 50/60HZ |
|
| |


